40
2017 Catalogue
Phone: 519-782-4052
Step 3
Start filling the pond with water, removing the
weights as necessary to allow the liner to take the
shape of the pond. Adjust the creases and wrinkles
in the liner as the pond fills. When the pond is full
and settled, excess liner may be trimmed, leaving
a 12" flap. Secure flaps until edging or coping is in
place.
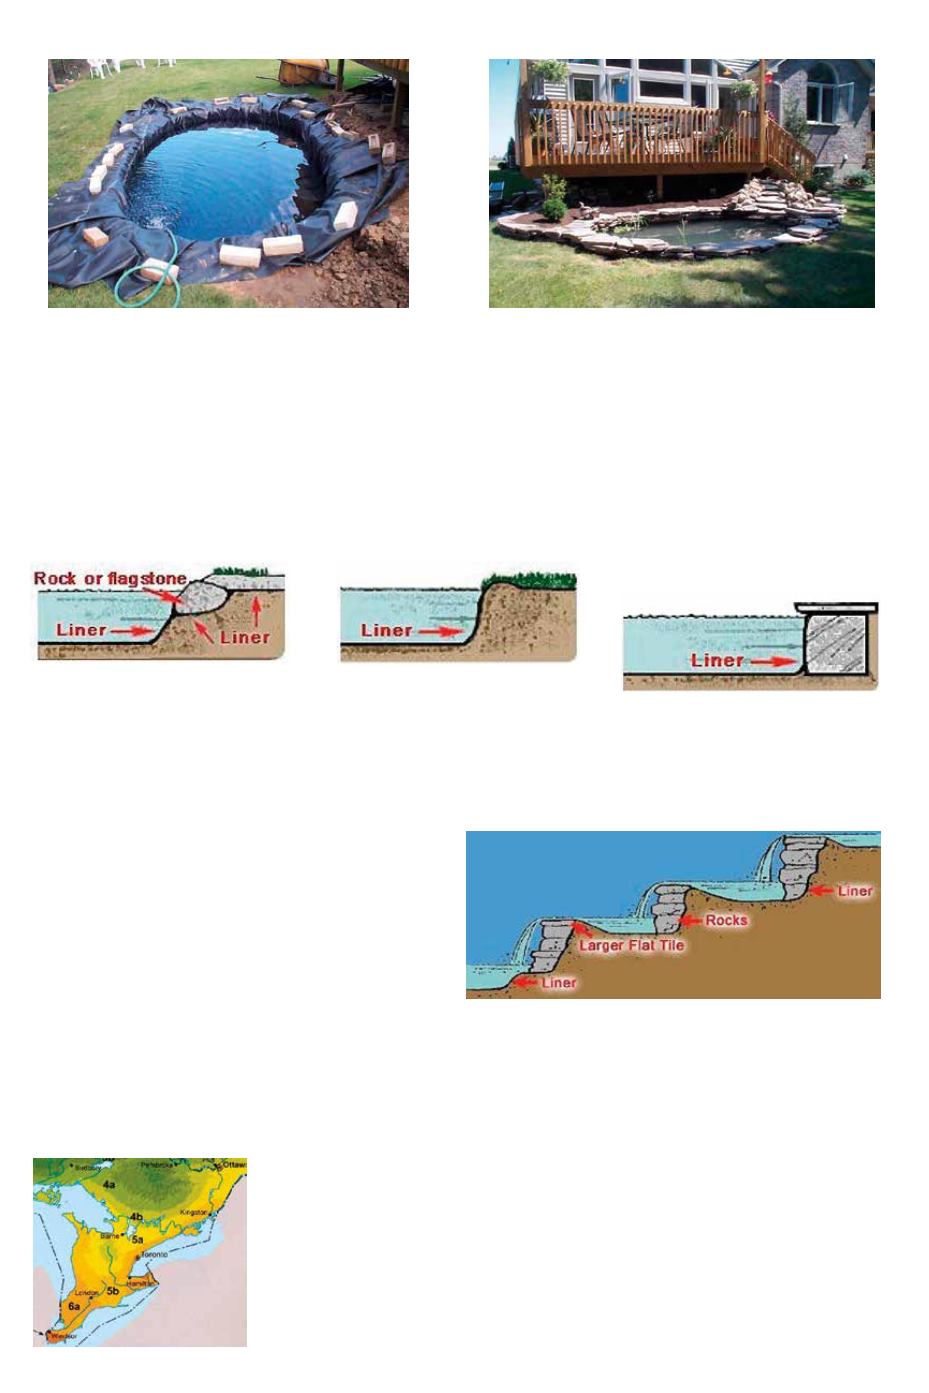
FALSE SHELF
Build a false shelf to support rock,
which will completely hide the
liner. This achieves a more natural
look and protects the liner from
U.V. damage.
SOD
Pond liner may be tucked in
a trench 8-12" from the edge
and covered with topsoil. Some
topsoil may spill into pond.
ABOVE GROUND PONDS
Blocks, railway ties or cedar may
be used to form the sides of
above ground pools. Be sure to
add a sitting edge.
Hardy Plants
Hardy plants are perennials and can be kept for many years. Some varieties may
require extra protection due to differences in your zone and actual microclimate
of your pond.
Plant Hardiness Zones for many areas in Ontario are shown to the left.
For more information on Hardiness Zones visit the Agriculture and Agri-Food
Canada website at:
(continued on page 41)
Step 4
Complete the finishing treatment of the pond’s
edges using the method of your choice (see
below). Concealing the liner gives a more natural
appearance and protects the liner from U.V. rays.
It may be necessary to rinse the pond and refill it
before stocking with plants or fish.
OVERWINTERING YOUR PLANTS
Finishing Treatments
Creating a Waterfall
Waterfalls may be added to the pool with a submersible
pump. Small pumps will give a nice effect at 2-3'. Large
pumps should be used for greater heights to create the
desired effect. See Determining the Correct Pump for
your Pond (page 38). Diagram of a watercourse showing
the way a liner is used to waterproof a channel. Smooth
rocks or stones may be used to conceal the liner and
create pouring lips for the waterfall. Be sure the waterfall lining extends all the way into the pond to avoid the
possibility of leakage. Avoid having water run behind rocks by using a sealant (See page 32).
INSTALLING A POND
cont’d


